How to Set up Surfshark on Android – Quick Guide

Many people rely on Android phones for their daily tasks due to their user-friendly interfaces and internet accessibility. However, with escalating cyber threats, your Android phone may not be as secure as it seems. Different entities track your online activities for different reasons, which makes no platform entirely safe. This risk is further increased on public networks.
If you wish to stay safe online, a VPN is the best choice to protect your personal information. If you are wondering how to use a VPN on Android, we suggest Surfshark on Android as the best VPN choice.
A Virtual Private Network (VPN) helps you stay anonymous online by masking your IP address making it impossible for anyone to track your online activity. Additionally, It also lets you visit websites that are blocked in certain countries as well. For the best VPN for USA, we suggest Surfshark on Android. We will also tell you how to set up Surfshark on Android as well.
Surfshark on Android offers a range of versatile features that ensure your security and accessibility. These include CleanWeb, Bypasser, Kill switch, end-to-end encryption, and a strict no-logs policy. Additionally, Android users can enjoy an exclusive 7-day free trial of Surfshark with a Surfshark download.
For more in-depth information about its features and services, be sure to check out our Surfshark review.
How to Set up Surfshark on Android – Easy Steps
Surfshark is one the best cheap VPN in the market. It provides different pricing bundles and is definitely a viable choice. This guide will explain to you how to install Surfshark on Android by following these easy steps:
- Install Surfshark on Android device
- Log into the Surfshark app on your Android device
- Connect to the Surfshark VPN on Android
- Choose server locations of Surfshark on Android device
- Manage Surfshark features on your Android device
- Manage Surfshark settings on your Android device
- Check if your Connection was successful on Android
By following these simple steps, you will be able to understand how to use Surfshark on Android.
1. Install Surfshark on Android device:
Setting up Surfshark on an Android device is easy. Just follow these steps:
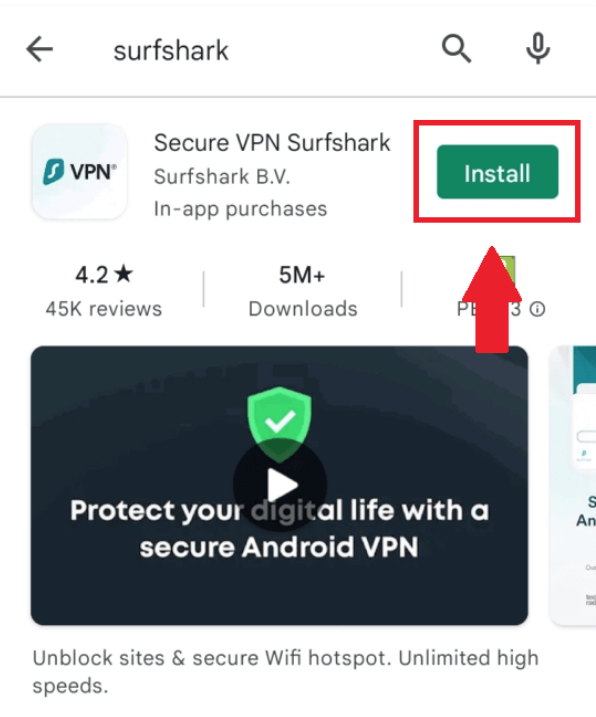
- Open the Play Store App on your phone.
- Use the search bar to type “Surfshark” and select the top result.
- Once on the Surfshark VPN page, click “Install” to begin the installation process. The app will download in just a few minutes.
2. Log into the Surfshark app on your Android device
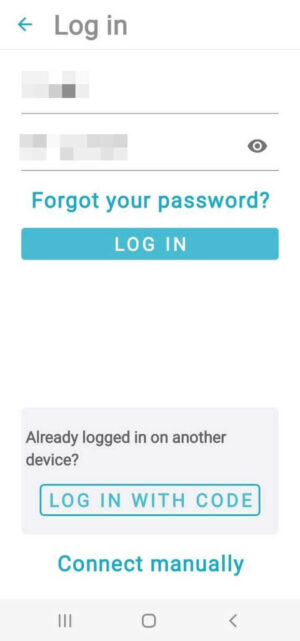
- Once the installation is complete, locate the Surfshark VPN icon on your home screen and open the app.
- If you’ve already purchased a Surfshark VPN subscription, perform a Surfshark login. If not, you can click here to subscribe to Surfshark.
- Enter the email address and password you used during the registration process, then tap “Log In.” This will grant you access to the app.

3. Connect to the Surfshark VPN on Android
- Once you have performed a Surfshark login to Surfshark VPN on Android, the home page will appear on your screen.
- Next, you will want to connect to a Surfshark server. Tap the “Quick Connect” button in blue, and Surfshark will establish a connection with the fastest server available on the network.
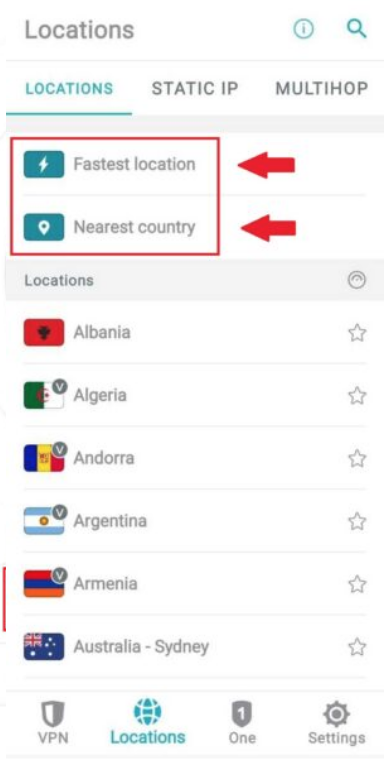
- Alternatively, you can select the “Locations” option. From there, you can choose either the “Fastest Server” or the “Nearest Country” option from the provided list.
- After you press the button, the system will request permission for Surfshark VPN to set up the VPN connection. It is important to allow this, as Surfshark will not be able to establish and manage the VPN connection otherwise. Press “Ok.”
- Once your app successfully connects to the VPN server, you will see the connection status displayed on the main screen. Look for the Surfshark logo and a key symbol at the top of the screen, indicating that you are now connected to the Surfshark VPN. To disconnect from the VPN, simply tap the “Disconnect” button on the screen.
- For more detailed information about your VPN connection, tap on the white arrow above the VPN connection status. Here, you can find your IP address, the total amount of data transmitted successfully, and an option for a kill switch feature. By following this simple procedure, you would be able to set up Surfshark on Android Samsung or any other Android mobile model.
4. Choose server locations of Surfshark on Android device
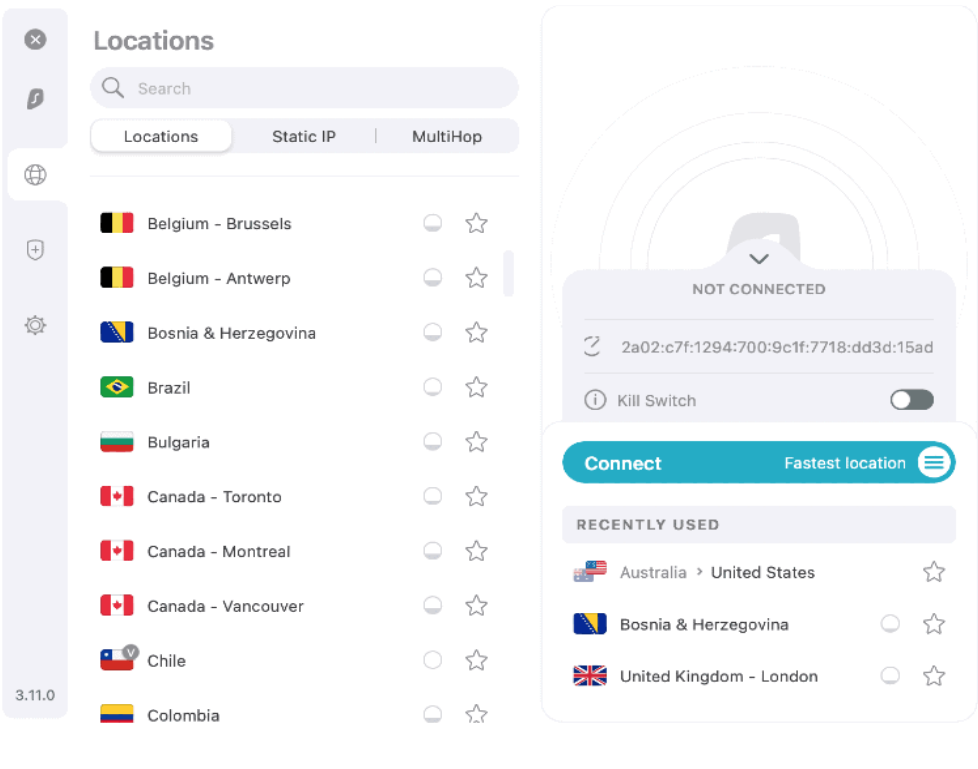
Surfshark boasts an extensive server network spanning 100 countries, totaling over 3200 servers. This allows you the flexibility to connect to any location you desire.
- Within your Surfshark VPN app, navigate to the Locations tab. You will find a comprehensive list of available locations. Choose the one you’re interested in and click on the flag icon representing that country. Your app will swiftly connect you to the selected location.
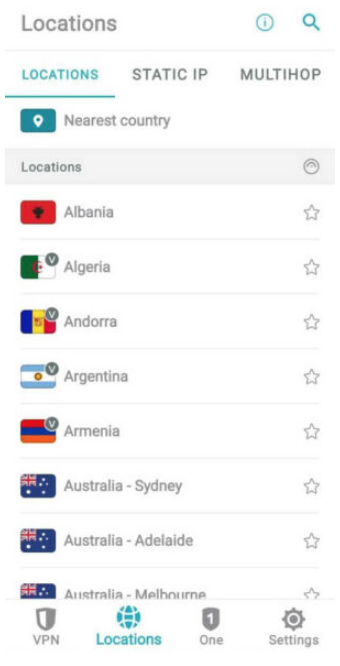
- By clicking on the speedometer symbol, you can view the location’s latency and traffic information. This provides you with the current latency for each location in the list. A lower latency value signifies a more dependable and stable connection to the server. Additionally, the bubble icon next to each server location indicates how many users are currently connected.

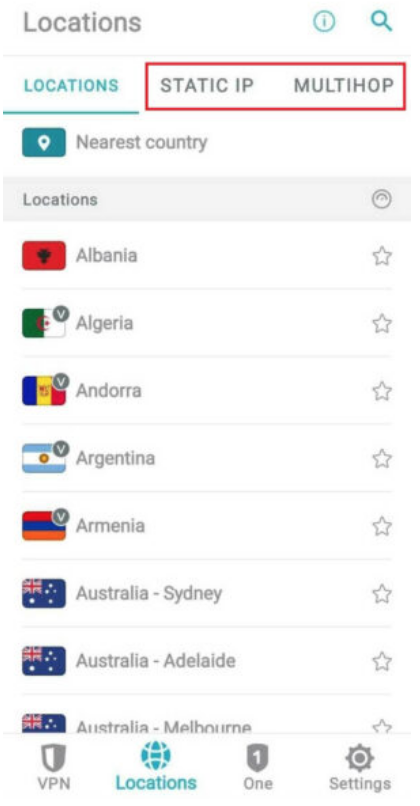
- In the Locations section, you’ll find two additional tabs: Static IP and MultiHop. These options are accessible at the top of the Surfshark VPN app when selecting a server.
Static IP: This feature assigns you the same IP address every time you connect.
MultiHop: It establishes a connection through two different servers located in distinct locations, adding an extra layer of security.
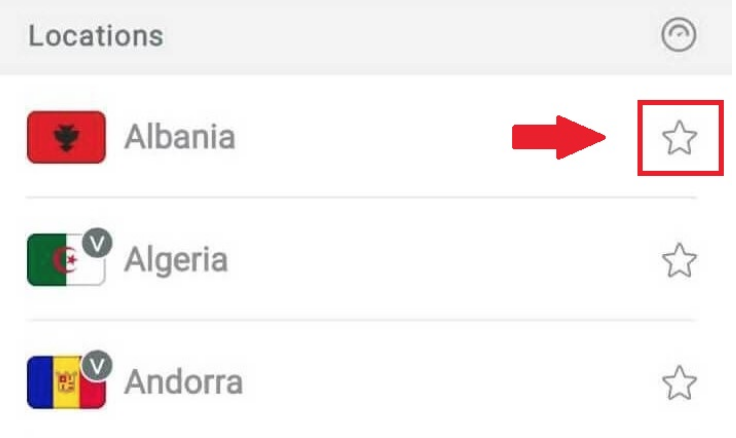
- You have the option to save your preferred server locations in the Surfshark app for future use. Simply click the star icon located to the right of the locations. This server will be added to your list of favourite servers.
5. Manage Surfshark features on your Android device
Surfshark provides top-notch and distinctive features to bolster privacy and security. Within the VPN Settings section, you’ll find a range of valuable options:
- CleanWeb: This feature shields you from malware-infected files, malicious websites, ads, and trackers before they even load. It thwarts phishing attempts and keeps spammers at bay.
- Kill switch: This safeguards your online activities by instantly disconnecting you from the internet if the VPN connection happens to drop, preventing any potential leaks.
- Bypasser: This operates as a split tunneling mode, allowing you to choose which apps go through the VPN tunnel and which ones use your regular internet connection. This gives you greater control over your online activities.
6. Manage Surfshark settings on your Android device
Surfshark VPN on Android allows you to customize the app to your liking, offering all the necessary settings to tailor and troubleshoot your VPN connection.
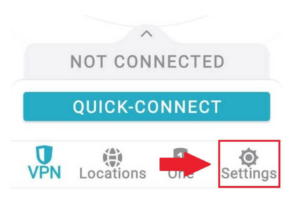
- Begin by navigating to the “Settings” page within your Surfshark app.
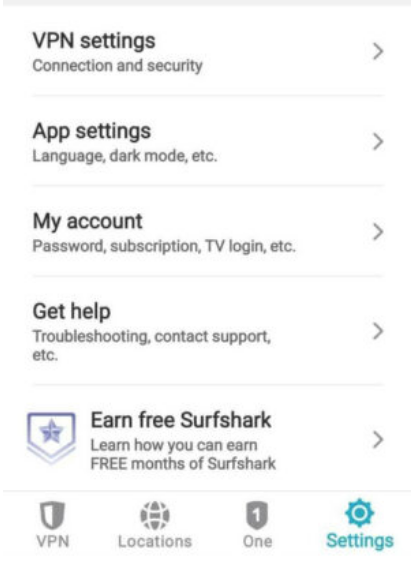
- In the Settings menu, you’ll find various tabs: VPN Settings, App Settings, My Account, and Get Help. Here’s what each tab does:
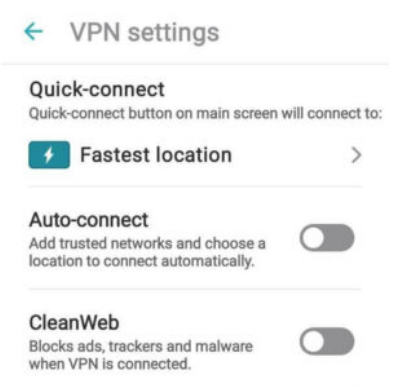
- VPN Settings: Here, you can activate auto-connect mode, choose which networks to connect to using this mode, enable the kill switch feature, select your preferred protocol, and utilize Bypasser.
- App Settings: This tab allows you to adjust the app’s language, check its version, and toggle dark mode on or off.
- My Account: Here, you’ll find your account details, including your email ID, login code, and plan expiration date.
- Get Help: This tab provides useful troubleshooting options and adjustments for VPN performance.
Within the VPN Settings tab, there’s an option for Advanced Settings, which includes the following features:
- NoBorders Mode: This mode allows you to easily bypass geo-restrictions and access content that may be banned or censored in other countries.
- Invisible on LAN: Activate this mode to make your device invisible to other devices on the network.
- Override GPS Location: This feature allows you to match your GPS location with your VPN connection location.
- Use Small Packets: This option divides your data packets into smaller parts, resulting in improved speeds.
- Rotating IP: This feature changes your IP address while keeping your location the same.
- Navigate to the ACCOUNT section to view your subscription details and change your Surfshark account password. You can also enable TV login for easy access to the Surfshark app on your television.
- The Help Desk tab provides a history of your previous chats with Surfshark agents. In case of technical issues, you can send diagnostics from your Surfshark app. Additionally, you can review Surfshark’s privacy policy and terms of service.
7. Check if your Connection was successful on Android
Once you’ve set up the VPN, it’s crucial to ensure the connection is successful. We strongly recommend verifying it. You can do this by conducting an IP leak test and a DNS leak test, both of which are available on Surfshark’s official website. This extra step helps confirm that your online activities are securely protected.
How to Connect & Disconnect Surfshark
Select the Country You Want to Access
If you want to select the country with Surfshark on Android, follow these simple steps:
- To access your VPN connection through a specific country, simply select it. Surfshark will then connect you automatically.
- Alternatively, you can click the blue “connect” button, and Surfshark will choose the fastest server for you.
- This will show another intermediary page indicating the connection attempt which will show something like “attempt 1 of 4”.
- Then the VPN will make a few attempts and then the VPN will be connected to the internet.
Disconnect From the VPN
Disconnecting from the VPN is very easy. All you have to do is to click on the “Disconnect” button on the VPN and you will disconnect from the VPN. It is that easy.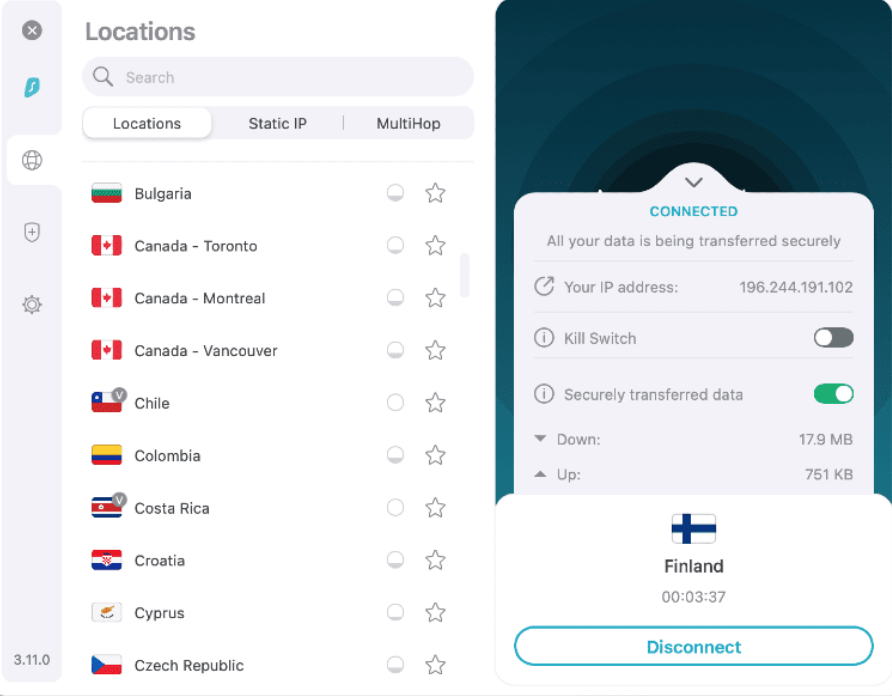
Why Should I Use Surfshark on Android?
Surfshark is one of the budget-friendly VPNs with premium and unique features. It works with all major operating systems like Surfshark on Mac, Linux, Windows, Android, etc. You must use Surfshark on Android because it is equipped with advanced privacy protection and powerful security features. With CleanWeb, browse the web with peace of mind, knowing your virtual space is spotless making it the top VPN with CleanWeb.
Surfshark on Android blocks ads, malware, trackers, and spammers with its CleanWeb feature. It lets Android users bypass geo-restrictions and access censored content from anywhere in the world. Using the kill switch feature, Surfshark protects user identity and prevents accidental exposure when the VPN connection drops by cutting off the internet connection.
Moreover, it’s the best multi-device VPN that allows unlimited simultaneous connections on a single subscription account.
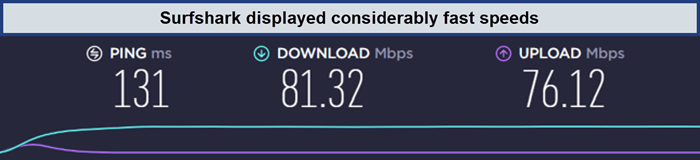
Surfshark provided excellent streaming speeds even on Android devices.
With its split tunneling feature, you can divide a load of apps by choosing the networks to route them. Android users also get a unique Override GPS Location feature which sets the user location to be the same as the VPN server location. On the Android version, you can select the type of encryption, protocols, and settings you want in your VPN connection.
Besides this, the Android app also lets you watch different Surfshark Netflix libraries, along with other streaming services like HBO Max, Hulu, Amazon Prime Video, and more. Moreover, Android users can get a 7-Day Surfshark’s free trial. This allows users to gauge its services before committing to its long-term plan.
Additionally, learn how to use Surfshark on Android with a simple Surfshark download.
Why is Surfshark on Android not working?
If you’re encountering difficulties with Surfshark on Android Samsung or any other Android, it is possible that certain apps may have taken control of your device’s network functions. Different networks, such as those in our homes, schools, and workplaces, may have specific restrictions in place that could potentially impede the VPN connection. To address these connectivity issues on your Android device, consider the following steps:
- Adjust Installation Method: Obtain the Surfshark on Android APK from either the Google Play Store or by directly downloading the .APK installable file. If you initially obtained it from the Play Store, try installing it through the .APK file this time, or vice versa.
- Switch Servers: If you are attempting to connect to a particular server location, it is possible that there may be issues with that specific server. Therefore, it is advisable to experiment with different server locations to ensure a successful connection.
- Adapt Connection Protocol: Different VPN protocols operate on distinct network ports. A specific port may be restricted in your home, school, or office, leading to connectivity problems or even a complete connection failure. Access the Advanced tab in Settings and test all available protocols within the app.
- Customise DNS Settings: Configuring custom DNS settings on your device can potentially enhance connection speed, resolve connectivity issues, and facilitate a smoother connection to the VPN.
- Disable IPv6: It is important to note that Surfshark does not support IPv6. Enabling it could potentially lead to server-related complications. While directly disabling IPv6 on Android devices may not be feasible, it is advisable to contact your ISP for assistance with this task.
- Update or Reinstall the Application: An outdated version of the Surfshark app may lack the latest support and features. Therefore, consider updating or performing a complete reinstallation of the app to ensure optimal functionality.
- Deactivate Problematic Applications: At times, antivirus software or other VPN applications may interfere with the functioning of the VPN, causing complications. We recommend temporarily disabling your antivirus program and uninstalling any other VPN apps to eliminate potential sources of interference.
FAQs – Surfshark On Android
Does Surfshark work with Android?
Is Surfshark the safest VPN for Android?
Is Surfshark free on Android?
Conclusion
Surfshark is renowned for its versatile features and robust services, seamlessly catering to a wide array of platforms including Android, tablets, and smart TVs, all at an impressively affordable rate. With its stringent privacy protection measures and military-grade encryption, Surfshark on Android is fast emerging as the go-to VPN for Android devices.
Its versatility extends to a range of other devices such as Surfshark on Nvidia Shield and more. Offering standard functionalities like no-logs, cutting-edge protocols, and unlimited bandwidth, Surfshark provides a comprehensive and secure VPN experience.
We highly recommend taking advantage of the 7-day free trial available specifically for Android phones. This allows you to personally explore the VPN model before committing to a full subscription plan.