How to Set up Surfshark on Mac in New Zealand – Easy Guide

In a world where the digital space is constantly threatened by invasion of privacy and cyber threats, the demand for enhanced online security has become louder than ever, particularly for avid internet users. For that reason, a VPN becomes your solution!
However, there are countless VPN services out there, and it is imperative that you choose the best one. The Best VPN can provide you with a safe space to protect your online activities, and you can browse anonymously.
After a thorough assessment of market competitive VPNs, we recommend Surfshark on Mac in New Zealand. This VPN not only obscures your real IP address but also integrates additional servers to strengthen your defenses against cyber threats.
As per our Surfshark speed test New Zealand, Surfshark VPN for Mac is a blend of velocity and versatility, offering rapid connection speeds, superior unblocking facility, and advanced security features, thereby ensuring that your Mac is aptly secured.
Opting for Surfshark VPN for Mac not only helps in masking this digital ‘fingerprint’ but also empowers you with the knowledge to manage your online identity.
As we delve deeper into the world of VPNs for Mac, let’s prioritize the security of our online activities. Join us as we explore the indispensable benefits that Surfshark brings to your Mac’s arsenal and step into a safer internet experience.
How to set up Surfshark on Mac in New Zealand [Easy Steps]
Surfshark protects your personal data and online activities on your Mac, allowing you to overcome restrictions and enjoy streaming your preferred shows seamlessly.
Follow these simple 6 steps to download Surfshark for Mac:
- Install the Surfshark application on your Mac
- Login the Surfshark app
- Connect to the Surfshark app
- Choose a server location from your Mac app
- Manage Surfshark features and settings
- Make sure your connection is successful
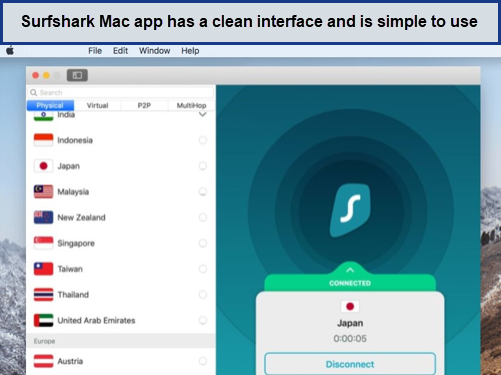
This is how the Surfshark application would appear on your macOS.
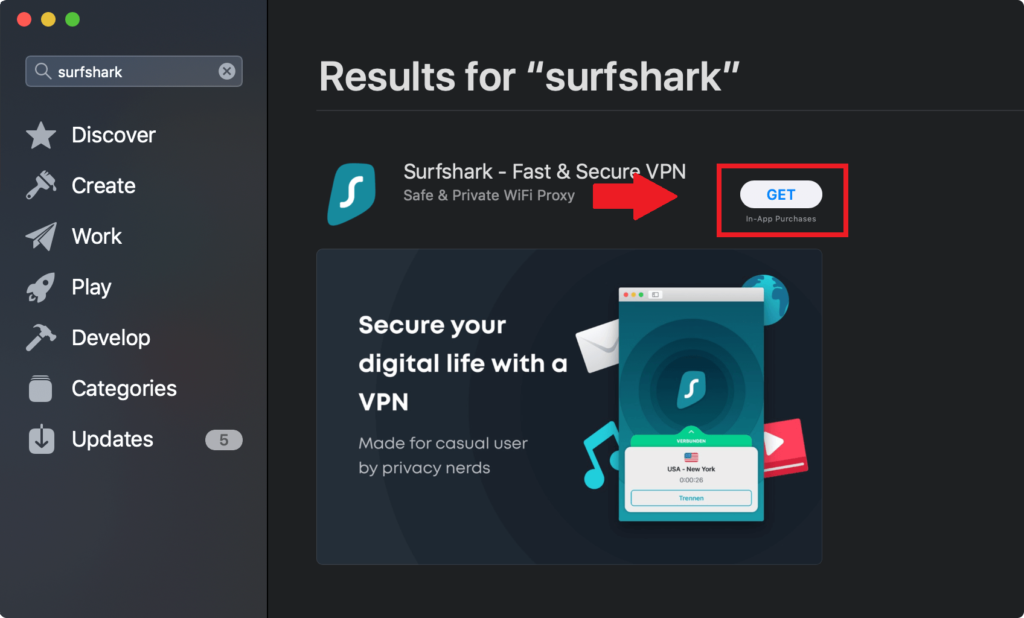
1. Install the Surfshark application on your Mac
- Look up the Surfshark VPN application in the App Store. Utilize the search function to locate the app, or simply follow the link given in this article.
- Click on the ‘GET’ button.

- Once the installation finishes, the Surfshark app will be installed on its own. Then, simply click on “Open” to launch the application.

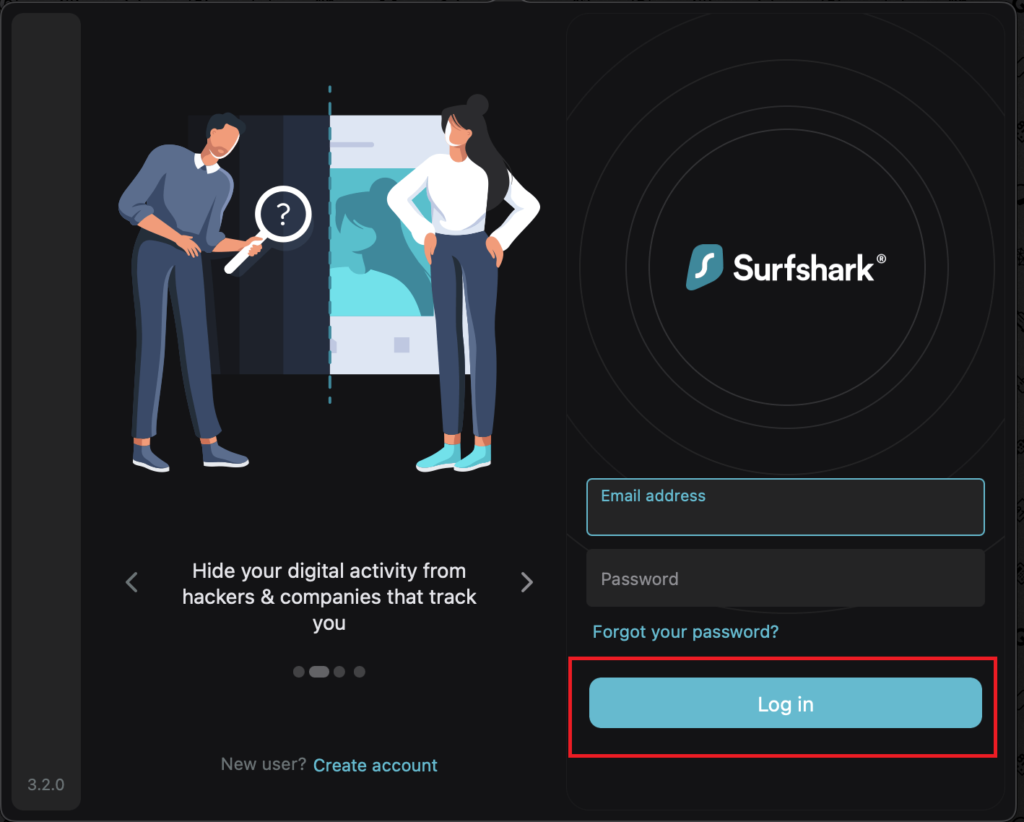
2. Login the Surfshark app
- After launching the app, you’ll need to sign in. Existing subscribers should select ‘Log in.’ If you haven’t subscribed yet, create an account first.
- Input the email address and password you registered with for the VPN. After entering your details, click on Log In.
3. Connect to the Surfshark app
When you open the app, you’ll land on the Surfshark app’s main screen. Here, you have the choice to quickly connect to the VPN, and you can view a list of server locations and their connection status.
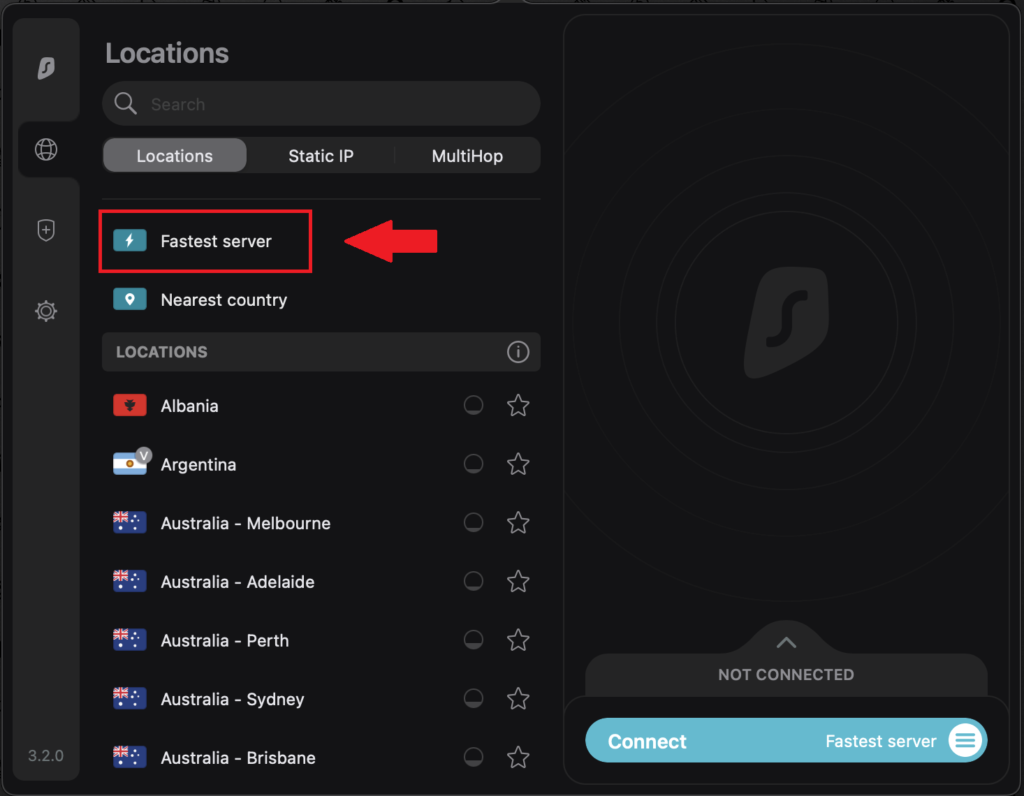
- Hit “Connect” to automatically join the quickest server.
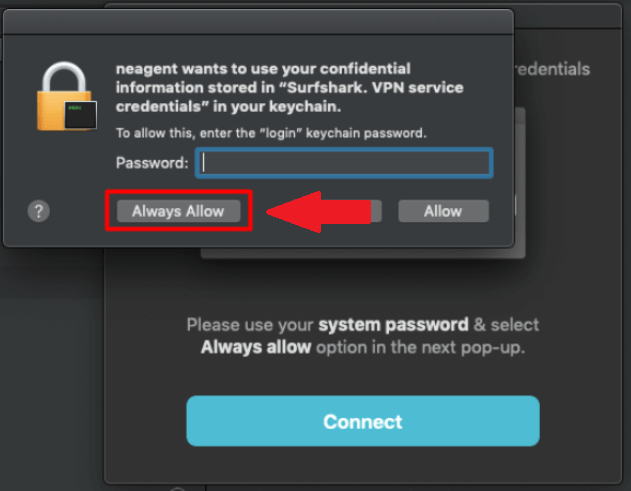
- The first time you connect, Surfshark will need to set up VPN configurations on your Mac. You’ll see a pop-up asking for your Mac’s user password—the same one you use to unlock your device. Enter it and click “Always Allow” to proceed.
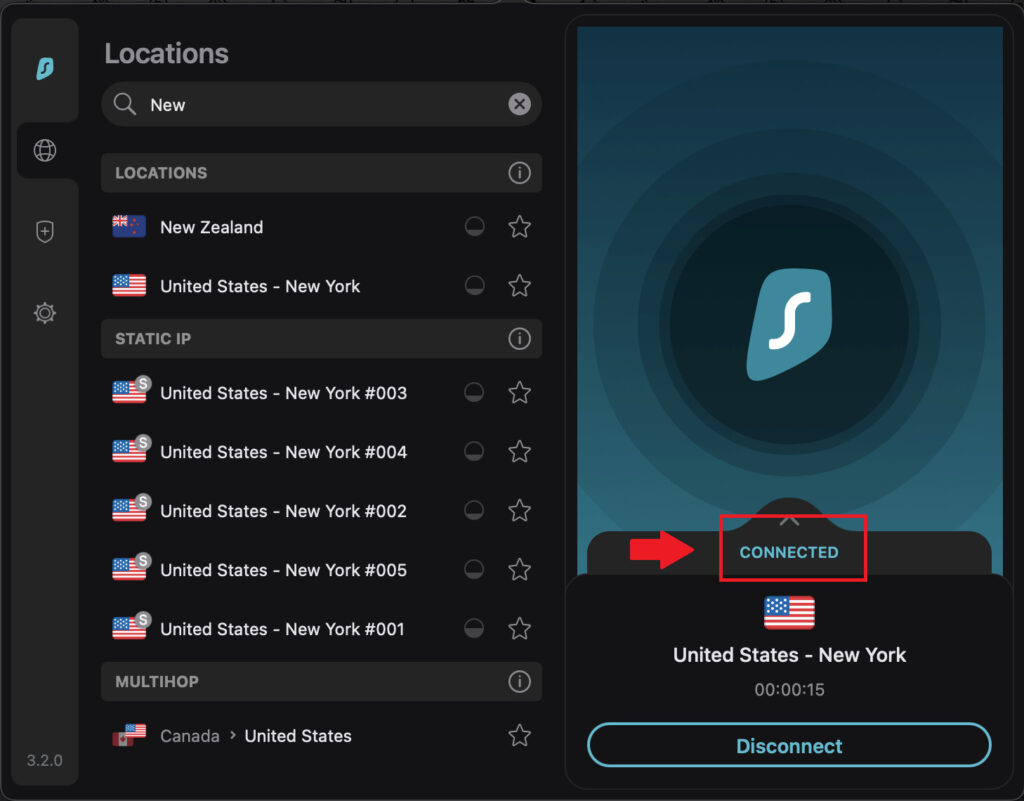
- Once connected, you’ll see a “Connected” indicator. To stop the VPN service, just click the “Disconnect” button.
- Click the arrow next to the connection status to reveal a drop-down menu with more details about your VPN connection, including your new IP address and the kill switch feature.
- You can switch your default server from the “Fastest” to the “Nearest” by clicking the button depicted in the provided image.
- Choose between the quickest server or the one closest to your country.

4. Choose a server location from your Mac app
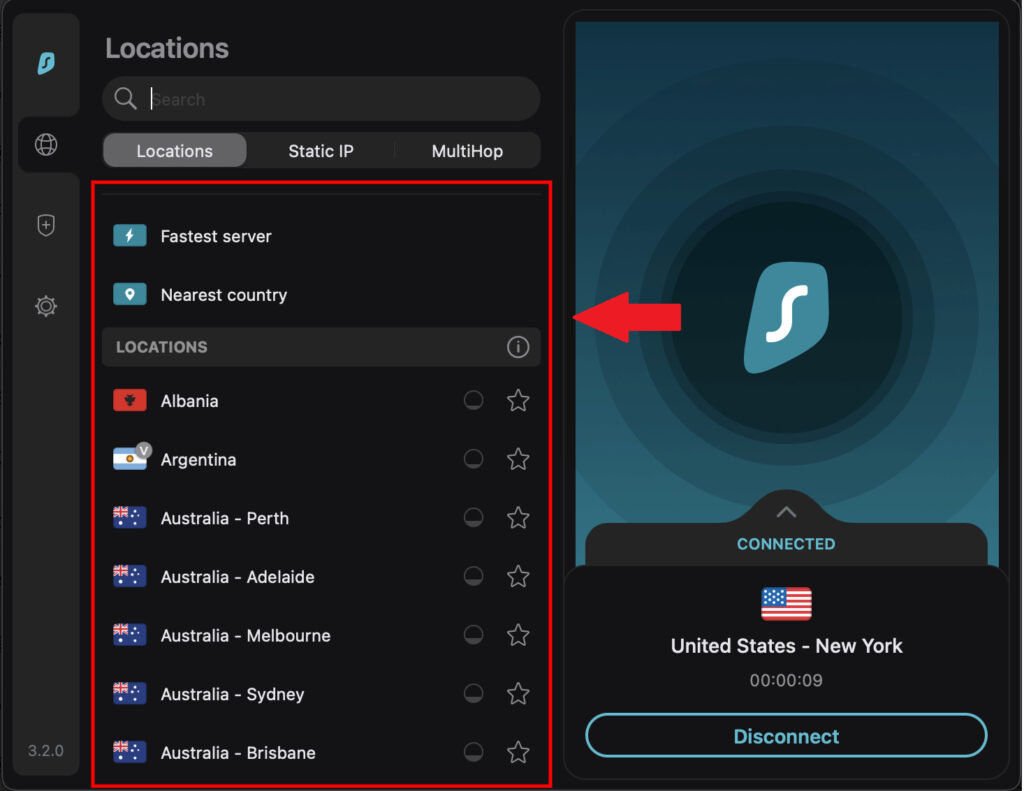
Surfshark provides access to a vast network with over 3200 servers across 100 countries, letting you choose nearly any server location you prefer.
- To select a server location in the Surfshark app, look to the left-hand side panel. Use the search function or browse through the list to find your location. Clicking the flag icon will initiate a connection to that server.
- If you have preferred locations, you can mark them as favorites by clicking the star next to them. These will then appear in your ‘Favorite servers’ list for easy access.
- The server load at each location is indicated by a bubble icon with a star. For instance, a partially filled bubble indicates that the server, like the one in Azerbaijan, is experiencing heavy usage. Surfshark stands out as an optimal VPN for obtaining an Azerbaijan IP address, offering competitive prices, quick speeds, and excellent features. Conversely, an empty bubble, like the one next to the Bahamas, suggests low server traffic.
- The Surfshark app also includes ‘Static IP’ and ‘MultiHop’ features:
- Static IP assigns the same IP address to you every time you connect, ensuring consistency.
- MultiHop allows you to route your connection through two different VPN servers in separate countries for added security.


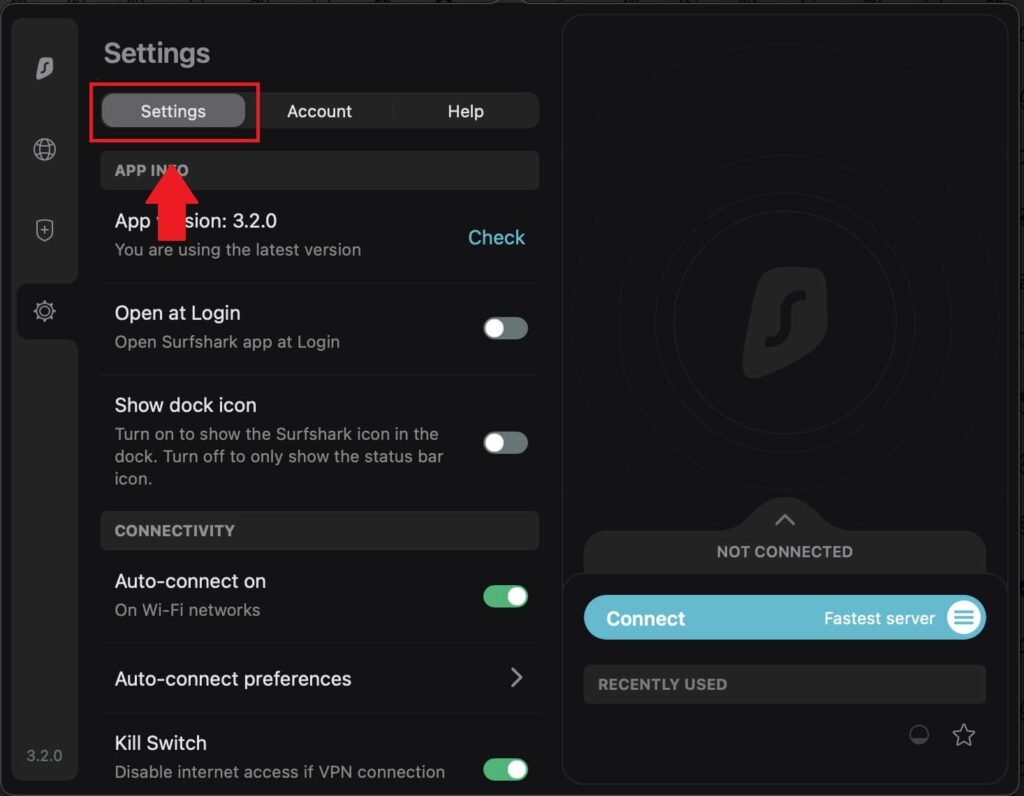
5. Manage Surfshark features and settings
You can manage the app’s features in the ‘Settings’ option.
- Within Settings, you have several choices:
- Open at Login: This setting allows Surfshark to launch automatically when you sign in to your Mac.
- Show Dock Icon: Enable this if you prefer the Surfshark icon to be visible in the dock upon opening the app.
- Auto Connect: Select a preferred server for the app to connect to automatically.
- On-quit: Choose whether the app should maintain the VPN connection or disconnect when you quit the app.
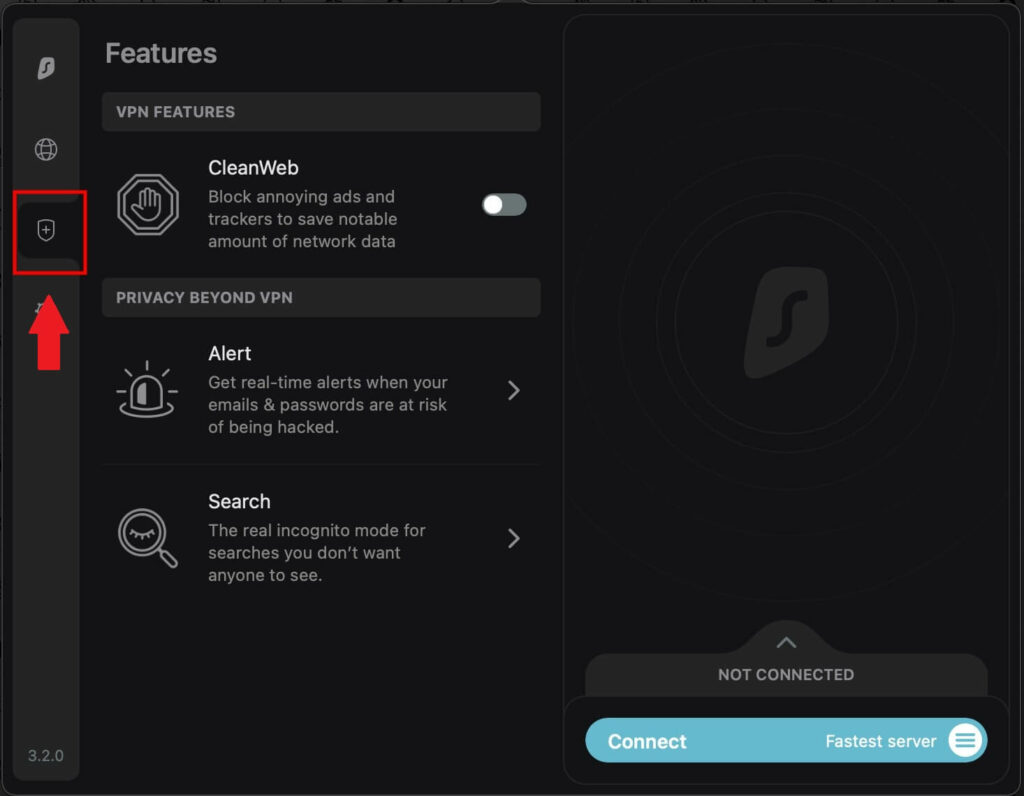
The Surfshark app provides three additional features:
- Alert: Receive immediate notifications if your passwords or email addresses become compromised.
- Search: A private web browser that allows you to search the internet without ads, trackers, or logs.
- CleanWeb: A search feature that eliminates ads and trackers, providing cleaner search results.
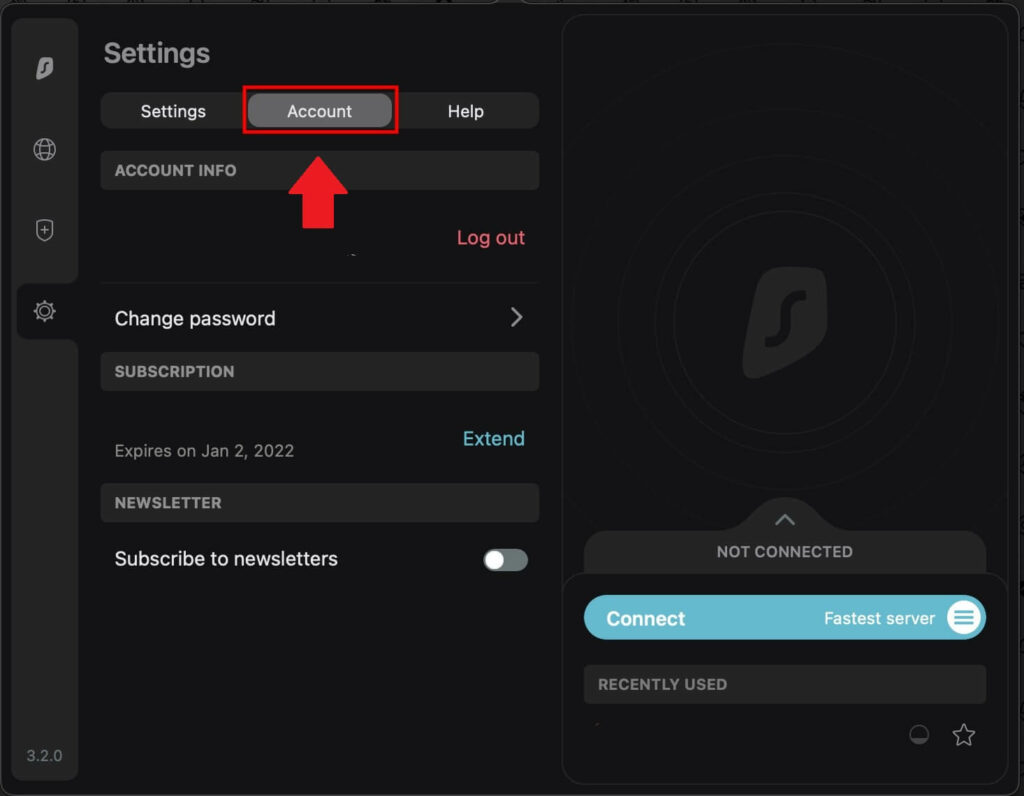
In the Account section of Settings, you can manage your account details, such as changing your password, opting into the newsletter, or upgrading your subscription plan.
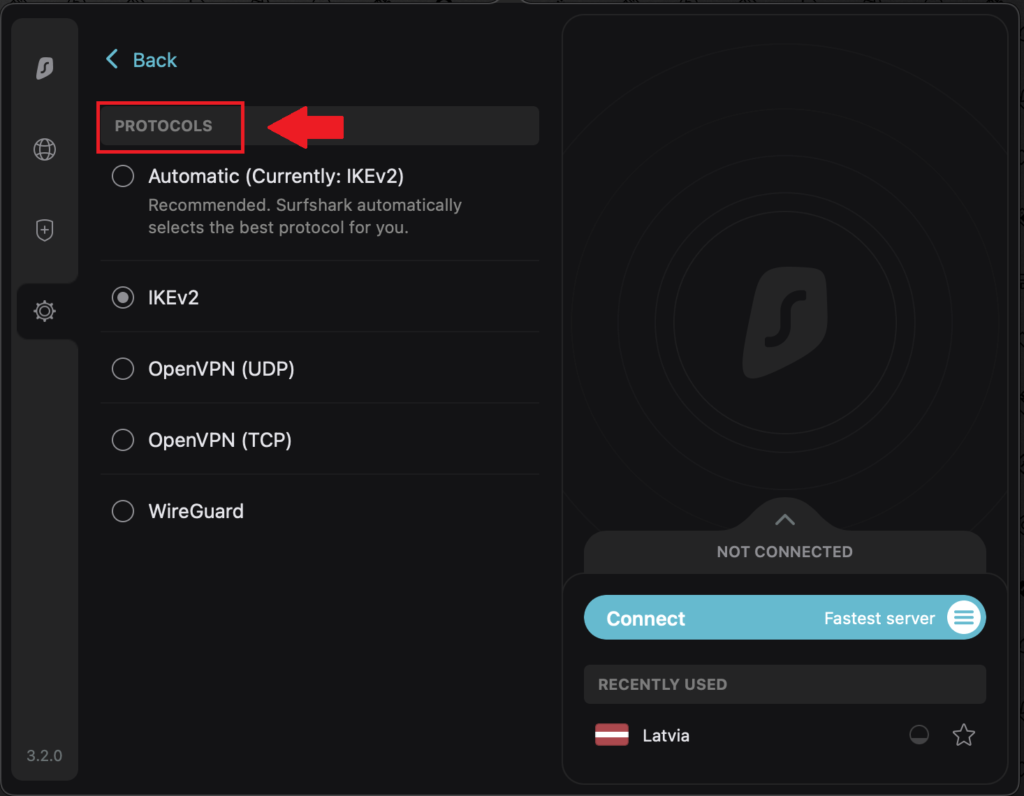
Accessing the Settings menu again presents you with the Protocol section, where you can select the connection protocol that suits your needs.
6. Make sure your connection is successful
Once you’ve finished Surfshark download for Mac, it’s a good idea to confirm that your connection is properly established. To ensure your connection is secure, consider running a DNS leak test or IP leak test. Additionally, the connection status displayed within the VPN interface will indicate whether you are successfully connected.
To further protect your Mac, you can install Surfshark Antivirus for Mac to have an additional layer of safety against trojans, worms, etc.
However, if you are not satisfied with Surfshark MAC, you can cancel Surfshark subscription easily. You can also claim a refund after canceling the subscription.
Why do you need Surfshark VPN on Mac in New Zealand?
Surfshark for Mac excels as a premium VPN service, tailored specifically to complement the security of macOS and iOS ecosystems. This service ensures that data transmitted from your Mac travels through a secure tunnel, safeguarded by advanced encryption protocols. Here are some of its prominent features:
- Overcome Geographic Blocks: With Surfshark’s Bypasser feature, you can easily circumvent geo-restrictions, making it simple to stream, download, and browse content from sites and platforms that are otherwise restricted, positioning it as a leading VPN for streaming services.
- Cost Savings: As one of the most affordable VPNs, Surfshark allows you to switch your IP address to one from another country, offering the potential for savings on online shopping and booking deals, especially since Surfshark’s subscription prices are quite competitive.
- Protect Your Data: In a digital environment where personal data and activity are at risk of being captured and sold, Surfshark’s robust privacy tools—including MultiHop connections, a Kill Switch, and RAM-only servers—elevate it as one of the most secure VPN solutions in the market. It is an excellent choice for securing your NetGear Router and offers versatile compatibility with multiple devices, making it the Best VPN for NetGear Router.
- Guard Against Malware: Surfshark not only blocks access to malware-laden content, ads, and trackers for a safer browsing and streaming experience on Mac but also extends this protection to other devices and operating systems like Android, Kodi, iPhones, and Nvidia Shield.
- Access to streaming services: Surfshark allows you access to various streaming services for your Mac. Using Surfshark Hulu and Surfshark Netflix New Zealand you can conveniently stream thousands of tv shows and movies.
If you’d like to read more Surfshark for Mac reviews, read our Surfshark review New Zealand.
Does Safari have a VPN on MAC in New Zealand?
Safari once supported VPN extensions, but it does not anymore. That’s because these extensions only protected browser activity and not other applications on your device that could transmit unprotected data, such as Netflix or Google Maps.
To fully encrypt all your data traffic, a VPN needs to encompass the entire device and that is where Surfshark comes in.
The Optimal VPN for Apple OS is the optimal VPN for Safari
Given that Safari is the default browser for all Apple devices, the ideal VPN is the one that protects the entire Apple ecosystem. While there’s no one-size-fits-all VPN, there are key features to consider for Apple users.
A top-tier VPN should offer more than just basic functionality—it should enhance your browsing experience. Surfshark emerges as a strong contender, particularly with its added perks like ad blocking and Siri shortcuts for convenient VPN management.
Enabling a VPN on Safari
To enable a VPN, in our case, Surfshark on Safari, follow these simple steps:
- Download Surfshark app, log in, and initiate a connection with the quick-connect feature.
(If you want to change settings manually on your Mac, navigate through System Preferences to Network settings and add a VPN connection.)
- Enter your chosen VPN’s details, authenticate, and ensure that all traffic is configured to go through the VPN connection.
- Apply the changes, and you’re ready to go with a more secure, encrypted connection.
Why Surfshark is the Top Choice for Safari Users
Surfshark is known for its compatibility with Apple’s operating systems, standing out with its competitive pricing, strong security features, and allowance for unlimited simultaneous connections. This makes Surfshark not just a VPN for Safari, but a versatile shield for all your Apple devices, ensuring your internet explorations are secure and private.
While Safari may not have a built-in VPN, Apple users have a strong ally in Surfshark. With its user-friendly interface, expansive features, and commitment to privacy, it’s an essential tool for any Apple user looking to protect their digital life.
FAQs- Surfshark on Mac in New Zealand
Does Surfshark work on Mac inside New Zealand?
Why is Surfshark not connecting Mac?
Do Apple devices need a VPN?
Is there a free VPN for Safari on Mac?
Conclusion
In an era where the boundary between privacy and exposure is extremely thin, Surfshark on Mac in New Zealand stands as a beacon of security for Mac users.
Surfshark gives a 7-day free trial for mobile devices and a generous 30-day money-back guarantee to test its capability. It also offers a shield with its top-tier AES-256 encryption, strengthens your digital presence with advanced features like Camouflage Mode, and provides a reliable kill switch that safeguards your data in the event of a connection drop.
Surfshark is further exemplified by its NoBorders mode and CleanWeb. Such comprehensive internal security measures place Surfshark at the pinnacle of digital safety. You can try all these features through Surfshark free trial New Zealand.
Using Surfhsark on Samsung Smart TV enables you to enjoy a secure streaming experience on a larger screen. This adaptability extends to Apple TV and Roku, embodying a one-size-fits-all VPN solution for all your entertainment needs.
All in all, Surfshark on Mac is not just a VPN; it’s a digital safeguard and a gateway to global content. With Surfshark, every Mac user can traverse the digital landscape with ease.